By Jared Harding Wilson
I first picked up carving years ago, sparked by a heartfelt desire to craft special gifts for my kids—each piece a quiet dream of seeing their smiles light up at some point in the future. And also for my future wife, making her wood carvings and dabbling into wood working making furniture hoping to warm her heart and our home someday. Using my trusty Dremel tool, I transform scrap wood from construction sites and cabinetry shops into treasures, perfect for Christmas gifts or any occasion to share some joy. 🎁 Spotting that discarded pile of wood feels like a little victory, turning what others overlook into something beautiful. If you’re thinking about wood carving or or trying to find a new design I hope this blog post inspires you.
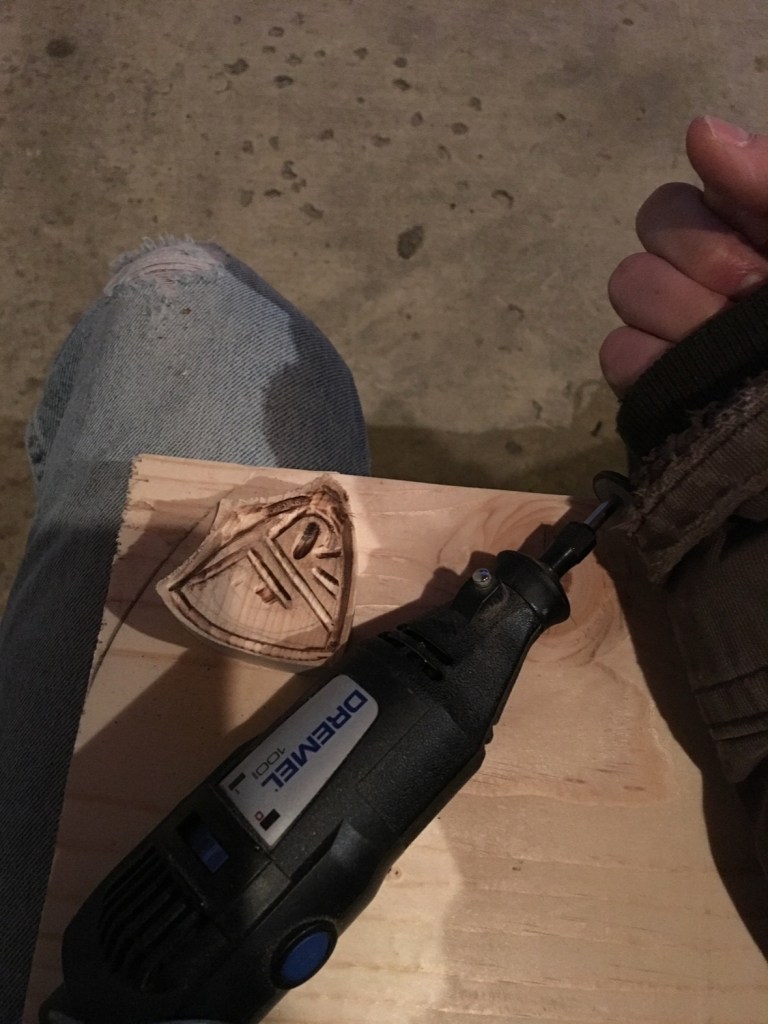
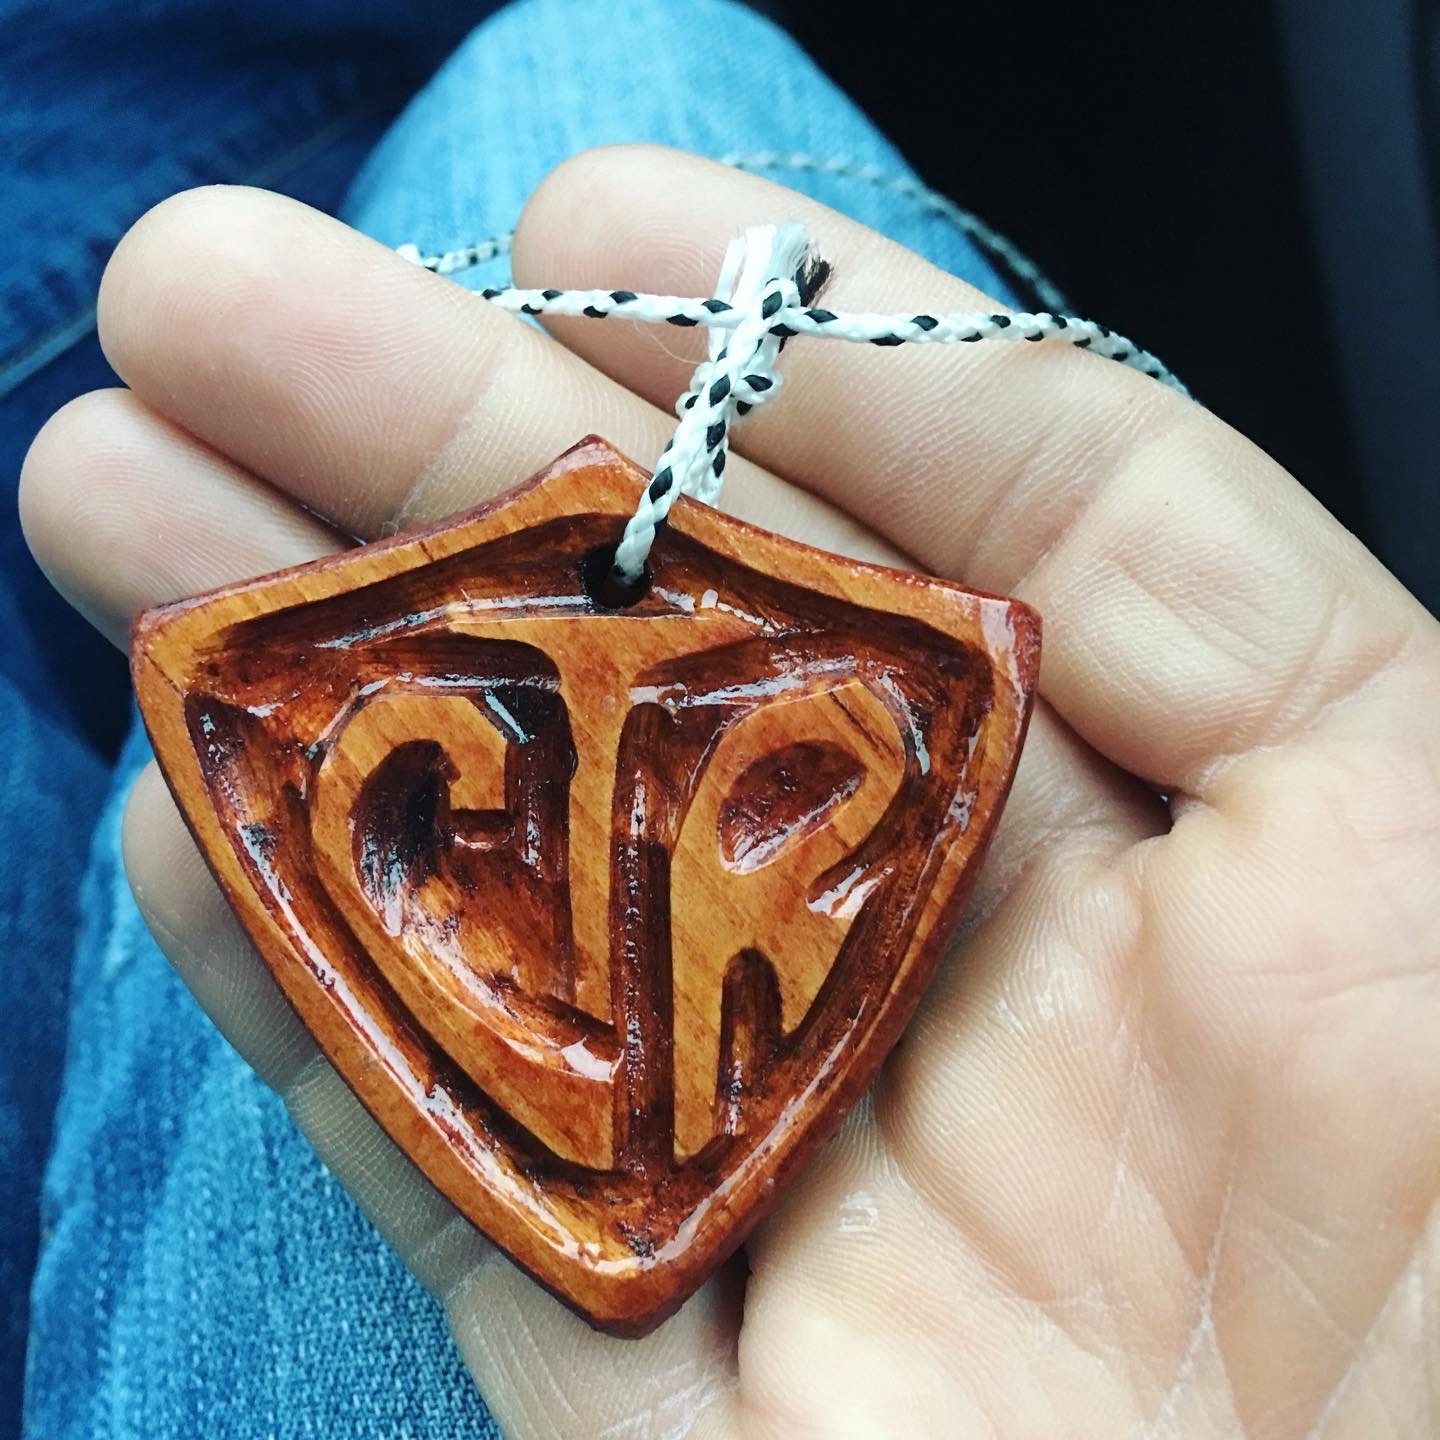
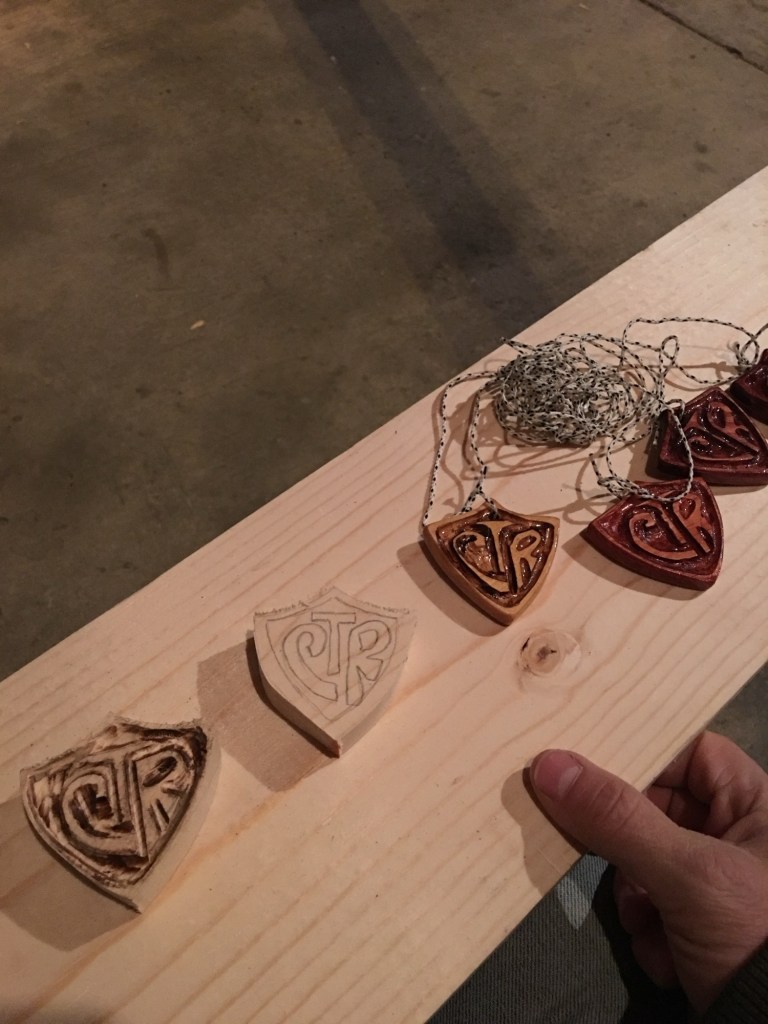
My process starts with a paper pattern I trace onto the wood—take your time here to get the lines just right! Then, I grab my jigsaw to cut out the shape, guiding it steadily to avoid splinters (a steady hand and a sharp blade are key). In the past, I poured my heart into CTR shields, a design that inspires me. Historically, the CTR (Choose the Right) shield came to life in the 1970s within The Church of Jesus Christ of Latter-day Saints, encouraging young members to make choices inspired by Jesus Christ. For me, it’s a soulful echo of WWJD (What Would Jesus Do?), a reminder to live with kindness, remember Jesus, and follow His example—especially when I think of the legacy I want to leave.
The carving magic happens with my Dremel, using a number of bits on the wood to etch the “CTR” design. Adjust the speed to match the wood’s grain—soft woods like pine you can use a slower speed. After that, sanding is a meditational space. I start with 120-grit to smooth the rough spots, move to 400-grit for a silky feel, and finish with 800-grit for that polished glow. It’s a long process—sometimes hours per piece—but it’s where I find peace to get my mind off of the struggles of the day. I often whip up a batch at once, leaving some natural to show off the wood’s character, while staining others with warm cherry, rich walnut, light maple, or bold oak. Picking a stain is like choosing a mood—experiment to see what speaks to you!
For finishing, I used to brush on semi-gloss polyurethane in thin layers, but now I really enjoy the look and feel of carnauba wax. Rub it in with a soft cloth and buff it to a shine—trust me, it brings out the wood’s soul! I drill a small hole at the top (use a clamp to keep it steady and avoid cracks), then thread braided cord, leather string or twine, tying a slip knot for an adjustable fit. Imagining these shields bringing comfort to someone keeps me going. On Amazon, I grabbed a case of different Dremel bits—try each one out to get a good feel for what they can do for your wood!
For new carvers, start with soft pine, grab a Dremel with extra bits, and practice on scraps. Wear safety goggles and a dust mask—dust flies fast! Keep your tools clean, and don’t rush the sanding; it’s where the magic happens. Try different woods to find your groove.
This craft has taught me patience, joy, and the power of creating with purpose. If you’re inspired, give it a go—start small, let your heart lead, and watch the wonders unfold. I’d love to hear from you! What’s your favorite carving project or a trick you’ve learned along the way? Drop a comment and let’s inspire each other! Happy carving! 🛡️✨
Photos by Jared Harding Wilson. All rights reserved.
Discover more from Hike Stars On Earth
Subscribe to get the latest posts sent to your email.
